Hi everyone! I've not been feeling well so I haven't been checking blogs... but I'm feeling better now so I'll come around and see all the things you guys are up to soon J.
Here is the tutorial I promised. It will be in sections over a few posts. Remember though, I am definitely no expert!!! I muddle along until it looks right and there is always something a little off J.
Okay, I started with a sketch. I'm a horrible sketch artist but you can kind of make out basically what I plan to do.
It's going to be a slanted design for the top piece, with "glass" in it so you can see all the treasures inside. It will need hinges, and I will need a lot of patience... I do not work well with hinges! I found a website or blog or book or something once that showed how to work with mini hinges, can't remember if it helped J. I'll have to try and find it again.
The bottom will be like a pedestal thing, minimally decorated.
I wanted the top to have a latch or lock mechanism in the front, but you will see later that I decided against that. No particular reason, I just didn't add it.
Some of the tools I used.

A piece of a dowel that I cut down to 2.75 inches, this will be the structural support. My handy dandy clay shaper. I had to wrap it with clear tape a long time ago because the clay on my hands was eating away at it. That was when I first started with clay and was using modeling clay. And then I also used a stylus, covered in paint and old clay J, and some Scupley III - my preferred clay.
Step 1: I covered the dowel in clay.
Then I added more clay to the top and bottom sections and worked out a rough shape with my hands.
Then I took my stylus and made some indents around the top. Just random ones, deeper at the top and less towards the bottom.
I then used my clay shaper to soften the indents and smooth everything up. Then I cut some clay off the top (remember from the sketch, there will be more decoration here). And I used a needle to make a line along the bottom edge for some design.
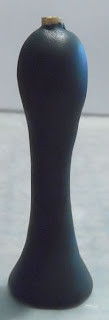
I used this wire brush thing to give the whole piece vertical lines for texture. It will sort of simulate wood grain and it will give the paint something to do J.
Then I scraped it off my work surface with my blade and popped it in the oven.
Okay, I'm moving on to a new post now for the rest.


Great Lorraine thanks for this tutorial I always find them so interesting and useful! We used this teqchnique for doing some of the candlesticks, a dowel with clay on top for stability, it works so well! xxx
ReplyDeleteI embed all sorts of things in clay for stability too! Sometimes I use active wire mesh, it's this stuff that looks like mini chicken wire. I just sandwich it between clay with TLS and bake, and then I've got a sturdy piece.
ReplyDeleteMuchas gracias por este tutorial. Unas fotografias muy clara y una explicacion perfecta. Espero la siguiente clase :)
ReplyDeleteBesos Clara
Thanks Clara, maybe I should have used a gray clay though, black didn't photograph the tiny details too well :).
ReplyDelete